Showing posts with label baking. Show all posts

Monday, 9 November 2015

Funfetti cupcakes

Playing with your food

I know they say that the above should be avoided, but I think we can make it an exception when sprinkles (hundreds and thousands) are involved. In my opinion, funfetti cupcakes are perfect whenever you need a little bit of colour to brighten up a grey and miserable day (these come quite often when you've got a busy and stressful work schedule). Baking them is the best way to de-stress and forget about one's hectic life for a bit (around 1 hour to be precise).


You can buy a pack of pre-made funfetti cake mix if you wish. However, I like to challenge myself to learn something new, so I selected an easy white cake recipe and simply added the sprinkles to it. Both ways are equally as good.

Into the oven they go
Sprinkles!
Pre-decorating mode
Of course good food deserves to be shared, so make sure you bake a decent amount (a dozen worked perfectly for me and my family)


And in case you're looking for a good birthday cake option, these delicious and light funfetti cupcakes are definitely worth going for.


Friday, 21 August 2015

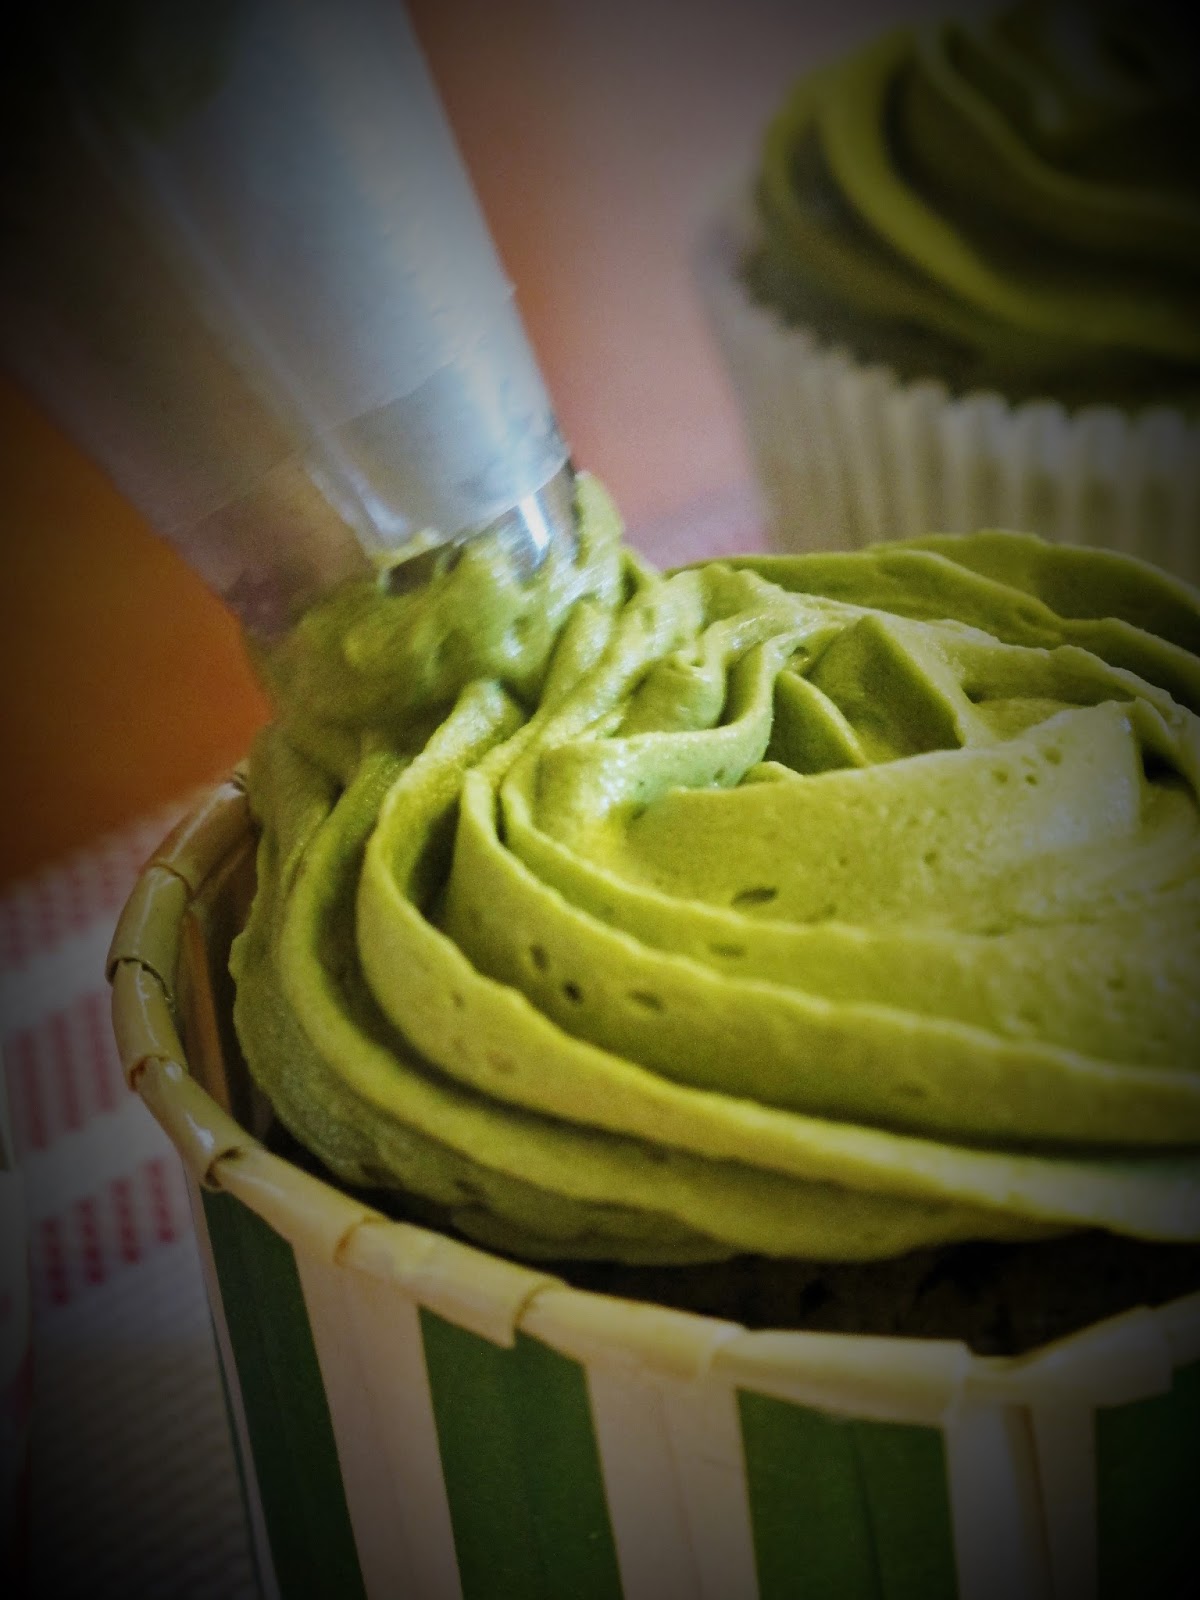
Matcha (green tea) cupcakes

Inspired by travel

Green tea buttercream frosting
One of the things that definitely struck me as memorable during my short trip to Japan (Tokyo) several weeks back was the food. Whether it was from a local noodle shop or a tiny street stall, everything I managed to devour was absolutely SCRUMPTIOUS. Seriously, I'd find it immensely difficult if I had to state what my most favourite dish was - I can't even list out every item we tried because there were too many! Think udon, curry and of course, sushi.

Piping perfection
For any amateur cook (comme moi), there's no doubt that all of the above ingredients can easily become inspiration for exotic, fusion dishes. However, rather than going down the savoury route, I decided to travel on the sweet path and  selected matcha as my special add-on. Also known as green tea, matcha produces a sort of bitter taste. However, when combined with a bit of sugar and baking-magic, it presents itself as the perfect ingredient for cupcakes (and simultaneously transforms them into a beautiful shade of bright green). Not overly sweet in any way, my suggestion for all you keen bakers out there is to challenge yourself to create a green tea buttercream frosting to go with your light and spongy cupcakes. Sure the cakes look great by themselves, but topping them with a swirl of frosting honestly increases their elegance (and also boosts your cake crafting status!).


The (standard) steps of baking (cake mix --> oven --> done)

Oh, and did I mention the cupcakes went down a storm/ very quickly into everyone's tummies? You definitely can't say no to giving matcha cupcakes a go.

The finishing touch
A photo of a photo
And although many of my culinary adventures have occurred through the lone wolf route, I always think it's fun to bake with other keen cake makers every so often (especially since we managed to make so many different treats within the short space of 3 hours!).

Decadent, dainty, & (very) delicious


Share the fun and cake - try baking with others for a change.

One of the tastiest lunches I've ever had! 
Matcha cupcake recipe: http://www.teaglad.com/blogs/matcha-green-tea-recipes/13493829-matcha-green-tea-cupcakes-recipe 

Matcha Cupcakes and Character Cakes

Sunday, 19 July 2015

Blueberry scones

Freshly baked
There's a very strong smell theme of "blueberries" that's been appearing recurrently throughout my foodie posts. Blame it on my taste buds, but these little gems are undeniably delightful (and healthy too!). They're delicious alone, in muffins (see my recipe here), or on pancakes with whipped cream. However, I've recently discovered that they also complement scones quite nicely. The inspiration behind this baking venture came mainly from a recent Vogue cooking video I watched (have a look here by yourself). Some of the ingredients were tricky to acquire where I was, and I also needed a recipe that minimized preparation time but could still maximize product quantity. So after a quick browse on Google, I managed to find my winner. And boy were the scones positively addictive - it was fun making them too!

A good way to de-stress and to make your tummy happy - that's my final verdict.

Recipe from:

Saturday, 20 June 2015

Carrot and Walnut muffins

A change of heart and taste


Hot out of the oven
When I was small, I absolutely HATED carrots (with a passion, I might add). The earthy taste of it was truly displeasing to my palette, and the bright, orangey color didn’t help either (if anyone’s thinking of getting me a gift, make sure it’s blue). I remember picking out the carrot cubes (and petits pois) from the rice we got for our school lunches every time before I started eating. Somewhere along the line of my youth however, I took a massive U-Turn on my dietary regime. It was probably when I went abroad for high school. All of a sudden, my childhood enemy transformed into a lifelong companion. The carrot I detested so much unexpectedly became particularly pleasing to my taste. For what reason exactly, I may never know. Be it boiled or raw, carrots and I are now two peas in a pod. It works best in a savory meal (humus specifically), although it functions incredibly well in sweets too. So, carrot and walnut muffins it was (add cream cheese frosting if you desire a tad bit more sugar).

Packed with protein, carbs and veg – if I could have cake for breakfast, I’d totally pick this.


Friday, 22 August 2014

Profiteroles with white and dark chocolate dipping sauce

Pudding for two


Hey ho it's a "baking" recipe - at last! Honestly, does anyone ACTUALLY remember the last time I blogged about one of my famous baking adventures? I certainly don't. Normally I'd make one of my old favorites (e.g. my fudgy (pure) chocolate brownies) because I am a total sucker for comfort food. But since I was making it as a dessert to share with my male half, I decided that it had to be something special. And who better to consult than the UK's "Queen of Cakes" herself? That's right, you guessed it - I'm talking about Mary Berry.

Her book entitled Mary Berry's Desserts to be more precise!

The blog title says it all - I obviously went for the profiteroles/ cream puff recipe (Berry, 2008: 195). Choux pastry has seriously never been easier to make. With simple instructions that are easy to understand, who'd thought that combining butter, flour and eggs together can come to create such sweet and delectable delicacies? And don't forget patience; these little French pastries require time, effort and the correct technique in order to make. The most enjoyable part in my opinion comes after all the hard-work (i.e. mixing, stirring and, of course, baking -- 30 minutes at 200°C to be exact), and no it's not eating them that I'm talking about (although that's nevertheless enjoyable). I personally like the part where I pipe oodles of homemade vanilla whipped cream into them.

Forget retail therapy, THIS is the sort of relaxer you need (i.e. baking).

The melting pot


Homemade White and Dark Chocolate sauce
If you've read my other foodie posts, you'll know by heart that I like to add a touch of creativity to every recipe I follow. It's simply a way of me being slightly rebellious but all for a good cause of course. So what exactly is your little twist this time? Simple: chocolate dipping sauce (aka. large-bars-of-pure-chocolate-melted-in-a bowl-on-top-of-a-boiling-hot-pot). And not just any old shop bought chocolate dipping sauce. This one, or rather, "ours" had white and dark chocolate in it. Colorful and delicious - why bother covering profiteroles with chocolate and then placing them in the fridge before consumption when it's SO much better (and more fun!) to dip them in yourself? Plus you avoid the (perhaps) occasional complaints from guests who argue that their cream puffs have less chocolate than the others - definitely a double bonus. 

A professional-looking dessert that takes minutes to make and will definitely impress and satisfy (the stomachs of) your guests (particularly if they're romantically attached to you). 

P.S. Don't forget to lick the spoon - that's (kinda of) the most important part ;)

x

Bibliography

Berry, M. (2008) Mary Berry's Desserts. London: Dorling Kindersley. 

Thursday, 10 July 2014

M&M and chocolate chip cookies

Edible color palettes #mylittlepieceofheaven
They always say that the color black can NEVER go out of fashion. Well for me, it’s generally out. Sure it can go with a lot of different sorts of items, but I daresay I much prefer the whole spectrum of colors that our world is made out of. I guess the perfect compromise would be to start off with a blank canvas or the color black and add splashes of blues, greens, reds, yellows etc. to it. It’s kinda similar to what I did with these cookies. I started off with a plain but good ol’fashioned chocolate chip cookie recipe (ELIZABETH, 2014) and then altered it to suit my style (i.e. adding pops of color, or in this case, M&Ms); I also had to adjust the size of the cookies (a rough estimate of them would be around the size of my face!) ß as you can see, I do like my cookies.

Be imaginative – try and “taste” the best of both worlds.

ELIZABETH (2014) “Best Big Fat Chewy Chocolate Chip Cookie” Recipe. [Online] Available at: <http://allrecipes.com/Recipe/Best-Big-Fat-Chewy-Chocolate-Chip-Cookie/Detail.aspx> [Accessed 10 July 2014]

Wednesday, 2 July 2014

Blueberry muffins

Good morning Wednesday

The "proper" way to start the day
I guess you can say (or tell) that I'm MAD about baking. Be it cakes, pies, cookies or even the odd meringue every so often, any oven-related cooking task is enough to keep me merry for the whole day (even if the day itself turns out to be quite a disaster).

I'm not sure why I haven't talked about this recipe before - oh well it's here now. Blueberry muffins are probably my to-go-for comfort food or breakfast choice for a sunny and early weekday morning. I probably should create my own recipe but I, personally, don't feel I'm at that level just yet (but I will be able to do so soon - I promise!). Anyhow, here's one of my all-time favorite blueberry muffin recipes. And if you do make them, I suggest baking them in colorful cupcake holders like the ones in my picture - life should be colorful, not plain.

Start your day off well - give the below recipe a shot :) xxx

Recipe from: KRUSTY (2013) "The Best Blueberry Muffins" Recipes [online] Available at: <http://www.food.com/recipe/the-best-blueberry-muffins-50719> [Accessed 2 July 2014]

Thursday, 3 October 2013

Madeleines (chocolate and walnuts)

When life gives you lemons
An overly used saying (well, at least in my life anyway) but often accompanied with the ending "make lemonade". Normally I'd agree with that - lemonade is an absolutely amazing drink! But, with the incoming cold weather, lemonade for me was definitely off the menu - lemonade and summer is the most inseparable combination, definitely not so much for autumn (feels like winter to me already though!).

Hide and seek - can you spot the madeleine tin? :)
Thinking hard of what to do, something caught my attention out of the corner of my eyes. I have a variety of baking tins in my house from a normal muffin tin to a butterfly shaped one - they're an absolute essential for any (amateur) baker. But on this occasion, it was the classic and oh-so-Français madeleine tin that appealed to me most. When life gives you lemons, I say, make madeleines :-)

Lemons - to use or not to use :)

Attention s'il vous plaît

I think that there's a tendency for people to think that French food is difficult and strenuous to make. Rest assured that this recipe is a complete foil to this common misunderstanding; you mightn't even need to go shopping for anything as what it calls for are simple ingredients that should be found in any household! It might be more tricky without and egg beater, but it's definitely possible (it's a good workout if you don't have one like I did - actually I did have one but I was too lazy to use it/ forgot that I had one. The recipe I used taken from Judy Farris's (2002) French Butter Cakes (Madeleines) recipe on allrecipes.com with some (yummy) alterations by me. A dozen light and lemony French cakes coming right up!

Geting started...

Ingredients

  • 2 Eggs
  • 3/4 Teaspoon vanilla extract
  • 1/8 Teaspoon salt
  • 1/3 White sugar
  • 1/2 Cup all-purpose flour, plus some extra for the madeleine tin itself.
  • 1 tablespoon lemon zest
  • 1/4 cup butter plus some extra for buttering the madeleine tin
  • 1/3 cup granulated sugar for decoration
  • 60g dark chocolate, melted*
  • 35g walnuts or almonds, crushed*
  • Icing sugar for decoration (use as much or as little as you want)*
* things I added that weren't used in the original recipe - you don't have to use them but it's highly recommended if you do :-)

Equipment

  • Mixing bowl
  • Wooden spoon
  • Dessert spoon
  • Egg beater (an electronic one is preferable if you have one)
  • Measuring spoons
  • Sieve
  • Rolling pin or kitchen mallet (to crush the almonds or walnuts -- alternatively you can get packets of pre-crushed walnuts or almonds in most supermarkets)
  • An oven
  • Madeleine tin (I got mine at Lakeland  which had 12 very cute madeleine molds- you can use a mini muffin tin if you want but it seriously isn't the same)
  • Saucepan (to help melt the butter and chocolate - I was worried about burning my chocolate and butter so I put the e.g. chocolate in a goblet and then placed it in a bowl of boiling hot water; If I'm not making sense, which is usually the case, Lesley Waters's tutorial on the BBC Food web is pure genius).

Method

  • Preheat the oven to 190°C, then butter and flour the madeleine molds
  • Melt the butter in the saucepan and let it cool to room temperature before use.
Mixture + tin = delicious baked goods in the making
  • In the mixing bowl, beat the eggs, vanilla and salt at high speed until light 
  • Whilst beating, add the sugar; continue beating until the mixture is thick and pale. Ribbons should form when the beaters are lifted; beating should take 5-10 minutes (if you don't have an electronic egg beater, you can use a normal egg beater instead - just takes a much longer time, and more muscles!)
A dozen golden madeleines ready for the oven treatment
  • Sift the flour into the egg mixture in three portions (hence 1/3 at a time); fold each portion in gently with the wooden spoon.
  • Add the lemon zest and pour in the melted butter. Gently and quickly fold the butter into the batter.
In the oven...
  • Using the dessert spoon, spoon the mixture into the molds. Do not over fill them - put enough so that there's still a 10mm gap between the mixture and the top of the mold.
  • Bake the madeleines in the oven for 14-17 minutes. Meanwhile, melt the chocolate in the saucepan and crush the walnuts or almonds using a rolling pin or mallet.
Freshly baked and ready to be decorated!
  • When the madeleines are done, take them out of the oven and place them onto a rack to cool for 5 minutes. Place in the fridge for a further 10 minutes to cool.
mmmm...melted chocolate :)
  • Take the madeleines out of the fridge and dip each of them into the melted chocolate; roll half or all of the madeleines in the crushed walnuts or almonds.
  • Let the madeleines chill up in the fridge before consuming

Et voila! Your madeleines are complete! I packed mine in a cute, vintage styled tin to bring to my friends - sharing is caring and it makes me happy; plus it's a great way to get people to unintentionally become your personal guinea pigs :)


So simple and scrummy, madeleines are seriously the perfect teatime treats for anyone who wants to live a slightly more classy life.

C'est vraiment la vie en rose une belle vie :)

Monday, 16 September 2013

Chocolate and Courgette (Zucchini) muffins

Note:

Dedicated to -- my gran; for always being there for me regardless of the trouble, and putting up to my wackiness and sporadic but frequent tempers for all these years without any complaints.

Daring to try

Sometimes I don't mind going out of my comfort zone when cooking - it's a good way to challenge myself and to get, hopefully, some good and new results. If not, it's still a good chance to learn anyway/ I mentioned I was using the book called, Annie Bell's Baking Bible, in my earlier post "Cranberry and White Chocolate Cupcakes". I had to flip through a couple of pages before I reached the recipe I needed for those cupcakes and there was one particular recipe that caught my eye: Courgette and Cinnamon Muffins. I'd made carrot cake before but courgette cakes? That was TOTALLY out of my league (at that point anyway). I kept the recipe in mind though and after a few days, I found myself looking up more courgette-related muffin recipes on the net. I finally settled with the Chocolate-Zucchini Cupcakes recipe written by Jen, an allrecipes.com contributor.

Courgette grating - dangerous work

The usual routine

There's no trick or surprise in every new recipe I try - they all start with a common beginning: locating all the ingredients. Seeing as I had a spare courgette sticking out of the fruit basket in my house, I was quite keen on making the muffins. The other things I needed were easy to find to as they were all buried deep in my dump-of-a kitchen cupboard - with all that settled, it was definitely time to start.

The colorful trio
The recipe asks for the following (note that I changed the serving amount to fifteen rather than two dozen because twenty-four muffins are too much for me; although it is tempting... ;) - click on the recipe's name to be redirected to the website where you can get the original recipe): 

The List

  • 35g unsweetened chocolate, melted
  • 2 eggs
  • 240g packed brown sugar
  • 150ml vegetable oil (I didn't have any so I used olive oil - seemed to work fine for me anyway)
  • 155g all-purpose flour
  • 3g baking powder
  • 3g baking soda
  • 2g salt
  • 140g grated courgette/ zucchini
  • 55g chopped walnuts
It also asks for 285g chocolate icing/ frosting and 30g walnut halves to decorate the cupcakes but I didn't want it to be too sweet so I didn't add any - plus I had something far better in mind.

Ingredients + utensils = mixing time
Also with the unsweetened chocolate, I used a bar of chocolate called "baking chocolate" from Lidl - the pieces of chocolate are all 10g each (as printed on each piece) and so it makes measuring the amount of chocolate much easier! Definitely worth a buy!

DIY (method)

As usual, you start off with preheating the oven to, in this case, 175°C (350°F).  

Taking a large bowl, you need to beat the eggs and brown sugar until it's thickened and pale. Because of the required condition, I assumed that I'd need an electrical egg beater (which I had, thankfully). It took me less than 10 minutes to achieve the "supposedly" required texture (emphasis on the "supposedly" -- underlying meaning to be revealed at the end).

Sweet and nutty
I then mixed in the oil and chocolate into the egg and brown sugar mixture (hereafter wet mixture). Taking another bowl, I combined the flour, baking powder, baking soda and salt together (dry mixture). Finally, using a wooden spoon, I slowly combined the wet and dry mixtures together by pouring the dry into the wet mixture. I find that it's best to start mixing just in the middle and then gradually expanding your area of mixing to the sides - your dry mixture will be thoroughly combined with the wet mixture and avoids any lumps from forming (which would otherwise spoil the texture of the cake!). Don't mix it too much - just until it moistens or is blended.

DIY muffin liners :-)

Tip in the grated courgette and give it a good mix before tipping in the chopped walnuts; I found chopping the walnuts a bit difficult so I kinda of crushed them gently just so that they managed to split in half easily using my potato masher.

Finishing touches
Taking my deformed plastic beaker, I poured the mixture into it and used it to pour the mixture into the muffin liners in the muffin tin I'd prepared earlier; I also used a rubber spatula to scrape and scoop out any remaining traces of the mixture (you really don't want to waste anything - it's something my gran always reinforced to me and it's becoming part of my daily ethos). I had proper cupcake liners but I wanted my muffins to be a bit taller so I used some normal baking paper, a pair of scissors and a bottle that was about the same size as my muffin tin to make my own muffin liners; I followed Emma Christensen's tutorial on the website, The Kitchin. The recipe suggested that I fill the muffin liners 2/3 full but there were quite a few times where I was slightly over-ambitious (at least I thought so at that time).

Baking - totally worth the wait
Before putting the muffins into the oven, I topped them with some mini marshmallows I'd gotten from the shops earlier - delightful. The muffins were in for 20 minutes and they came out a nice, shiny brown color. The look of them made me worry that they weren't full baked but, after inserting a toothpick into each muffin, I found that they were all ready to rock and roll (not literally of course). 

Evaluation

I definitely have to say that one of the biggest problems I had and it was purely my own fault were the amount of little air bubbles that had appeared on the muffin's surface - I went a bit wild with the whisk (because it'd been ages since I'd used one) so I'd over-beaten the sugar and eggs so that the mixture actually became a bit too light and airy. There was too much air in the muffins and was hence why the surface of my muffins didn't look that appealing; the marshmallows had melted too which wasn't too much of a problem but I kinda wished they hadn't. Next time I'll remember to beat the egg mixture for a shorter amount of time, if using the whisk, or to simply use a hand whisk so that I can control the strength of the beating. As for the marshmallows, I guess I could simply put them on-top of the muffins after icing them with a bit of frosting (aka edible glue).

Freshly baked
HOWEVER, in terms of flavor, they were absolutely perfect. They were sweet and chocolatey, but not too sweet because of the courgette. The courgette gave it a really moist and soft interior, and the chopped walnuts added a bit of surprising but satisfying crunch to the muffin. And, even though I had over-beaten the mixture, it made the muffins very light and not dense (definitely good for people who are dieting but want to treat themselves once in a while!). 

A combination of ups and downs (purely because of my over-ambitious personality/ because it was 11pm and adrenaline was kicking in to keep me awake and crazy) but definitely a great recipe - I wait patiently till my muffins have been eaten (by friends of course :-) in anticipation of the day when I make them again.

Packed and ready for my friends :-D


Thursday, 12 September 2013

Banana bruffins

From the kitchen window...

Thursdays are my day off from work and the indication of a long long, LONG weekend for me. And breakfast being the starting point of my day, after getting dressed of course, was no question. This morning however had me waking up and craving for something homemade. On work and uni days, an efficient and time-saving breakfast is absolutely necessary so I often opt for cereal, yogurt and fruit. With the sun beaming down on me and free-time in hand, my brain switched from being "fast asleep" to "feeling creative and hungry" as I gazed out my kitchen window. 

Daydreaming...
Something I haven't had for long time, that's what I want to make. I love trying new recipes but there are times when one desperately wants something comforting and convenient to make - things I've tested before and are familiar really. My eyes landed on two overripe bananas hanging on the arm of my fruit bowl. Banana bread, I thought, now that's what I want.

Google search + allrecipes.com

That's how I usually roll when it comes to cooking - like I said before, cookery books are often for gazing at and admiring the quality of the pictures rather than to be used as my blueprints for cooking in my house. I knew exactly which recipe I wanted - I'd tried it many times and it's never failed me. Banana Banana Bread - a recipe created by Shelley Albeluhn (2000), a contributor to allrecipes.com's dazzling archive of fun and fresh recipes. Her recipe yields approximately 12 servings or one big loaf which, is indeed a nice and appropriate amount, was a bit too much for my one stomach - I didn't want to end up eating banana bread for one whole week! Also I didn't have enough bananas for that amount anyway - time to give the recipe a little twist and alteration.

Let the fun begin!
To make the banana bread, Albeluhn (2000) asks for the following - note that the amount has been halved because that's all I wanted, so do double it if you want the original amount:

The List

  • 1 cup / 125g all purpose flour
  • 1/2 tsp / 2g bicarbonate of soda
  • 1/8 tsp / 0.8g salt
  • 1/4 cup / 55g butter
  • 1/4 cup and 2 tbsp / 55g brown sugar
  • 1 egg, beaten
  • 1 cup and 3 tbsp / 260g mashed overripe bananas
Simple isn't it? Just some common kitchen essentials and, the secret, overripe bananas. In terms of equipment, I had three bowls, a set of measuring spoons, one measuring cup, scales, a potato masher, a muffin tin and liners, wooden spoon and, my favorite and critical weapon tool, a rubber spatula. I had both the scales and measuring cup only because the side of my measuring cup kind of melted (don't ask me, I don't know what happened but it's slowly dying - will have to replace it soon :(  so I can't see all the numbers properly. So I had to rely on the scales for some of the measurements e.g. the amount of flour.

At work...
To start off, preheat the oven to 175°C mix together in a bowl with the wooden spoon the flour, bicarb. of soda and salt. Since I had a muffin tin and liners, I didn't grease a loaf pan (I think it would be  7" or 9") like the recipe asked; do this if you want to instead of my way. In another bowl, cream together the brown sugar and butter - you're supposed to use an electric beater but I didn't have one so I used my wooden spoon instead; do use the beater if you have one! Mash the bananas in the remaining bowl using the potato masher and alternatively with a fork if you don't have one.
 Pour the mashed bananas into the creamed brown sugar and butter as well as the beaten egg and mix with the wooden spoon. Thereafter pour the banana mixture into the flour mixture and stir only to moisten - otherwise your banana bread will be dry and that would be very sad (Albeluhn, 2000). 

Finishing touches -- dried oats and desiccated coconut flakes

You can then pour the mixture into the muffin liners in the muffin tin or the prepared loaf pan using the wooden spoon. I didn't want to make a mess so I poured my mixture into the measuring cup and used that to pour the mixture into the muffin liners; I scraped every last bit of it into the liners using my rubber spatula to avoid wasting. The reason why I used muffin liners was that I didn't have a small enough loaf pan to accommodate for the amount of mixture I'd made - you don't want a huge pan for a small amount of mixture as your banana bread will come out very flat (that's happened to me before!).\ I was technically making banana muffins but as the recipe is for banana bread, I have renamed my muffins banana bruffins in honor of the two kinds. To give it an additional twist and a bit of crunch, I added some dried oats and desiccated coconut flakes on top of each muffin - I even did two 50/50 ones where half was covered in dried oats and the other half in coconut flakes.

Before...
I popped mine in the oven for around 35 minutes seeing as 1) I only made half of the original amount and 2) I made mine into muffins so there was a bigger surface area to volume and hence would require a smaller amount of time to bake (thank you year 9 science). When my flat began to smell strongly of freshly baked banana bruffins and the alarm on my oven began to ring, I knew they were done :)

After...
So, after a long but fun and relaxing one hour, my breakfast was finally complete. The bruffins should be moist and slightly bouncy (not the best way to describe the texture but hey you get the point), and the top should be crunchy and golden (yum!). Good to eat and to share with people you love/ know/ feel like treating/ want to use as guinea pigs for future kitchen experiments (muahahaha).

Freshly baked - what could be better, seriously?

A day off work for everyone, in my opinion, calls for an indulgent way to start the day. It doesn't mean that it averts me from doing the cleaning and washing up though (meh... -___-) but, at least it gets you going on the right foot right? :)

A beautiful mess :)

Bibliography

Albeluhn, S (2000) Banana Banana Bread [online]. Available at: <http://allrecipes.com> [Accessed 12 September 2013].