Showing posts with label cooking. Show all posts

Saturday, 20 June 2015

Carrot and Walnut muffins

A change of heart and taste


Hot out of the oven
When I was small, I absolutely HATED carrots (with a passion, I might add). The earthy taste of it was truly displeasing to my palette, and the bright, orangey color didn’t help either (if anyone’s thinking of getting me a gift, make sure it’s blue). I remember picking out the carrot cubes (and petits pois) from the rice we got for our school lunches every time before I started eating. Somewhere along the line of my youth however, I took a massive U-Turn on my dietary regime. It was probably when I went abroad for high school. All of a sudden, my childhood enemy transformed into a lifelong companion. The carrot I detested so much unexpectedly became particularly pleasing to my taste. For what reason exactly, I may never know. Be it boiled or raw, carrots and I are now two peas in a pod. It works best in a savory meal (humus specifically), although it functions incredibly well in sweets too. So, carrot and walnut muffins it was (add cream cheese frosting if you desire a tad bit more sugar).

Packed with protein, carbs and veg – if I could have cake for breakfast, I’d totally pick this.


Tuesday, 29 July 2014

Home-made potato crumpets

An indulgent breakfast/ special treat


I think the key to ANY meal, be it for a boyfriend, parent or even yourself, is to be proactive. Good food comes with time and preparation, so it’s vital that you plan ahead. This time it was breakfast that I was preparing in advance for. After reminding myself that it would be best not to wake my significant other up early so that I could start cooking, I decided to make a part of the dish just the night before.

Home-made potato crumpets it was then.

The recipe was yet again from the genius chef, Rachel Khoo (2014). Only this time it came from her latest TV series, Rachel Khoo’s Kitchen Notebook, which was about her latest cooking adventures that were inspired by her hometown, London. I just thought well, if it only takes around an hour to make something THAT special for breakfast, then it’s definitely worth a shot. The only issue was getting the potato flour. I’d never bought it before so I guess it was really lucky that my local health food shop stocked it!

If you have a circular ring for cooking, be sure to use it or else you won’t get the nice crumpet shape that I guess any keen cook (or perfectionist) would be aiming to achieve. Following Khoo’s instructions, I topped my crumpets with a circular, sunny-side up egg, yet again using the circular mold. And adding some freshly roasted sliced red and yellow capsicum (or pepper) and fried mushrooms will definitely help you earn a couple of extra smiles (or kisses) from those you’re cooking for.

My ending point to this blog post is that although it was great that I made the crumpets the night before, thus meaning I was well-ahead of my schedule, it really is best to eat it straight away so that you essentially bite into a hot and fluffy cloud rather than a slightly hard fried good that we did. Still, I was happy that I’d planned it out (otherwise we would have had boring old toast for breakfast).

Ultimately though, it was delectable.

Khoo, R (2014) “Potato Crumpets with Maple Gammon, Tomatoes and Egg” Recipes. [online] Available at: <http://uktv.co.uk/food/recipe/aid/659162> [Accessed 29 July 2014]

Tuesday, 22 July 2014

Spinach Tortelloni in a Chopped Tomato Sauce topped with Sliced Soft Mozzarella


Speedy but scrumptious

I think it’s fair enough to say that at the end of a long and tiring day, the last thing that ANY of us wants to do is to spend hours cooking up a meal that may in fact turn out to be, quite simply, a disaster. And let’s not forget about the washing up – definitely not my cup of tea. In any case, we need food to function, so here’s a quick and simple recipe I came up with for one of my all-time favorite comfort foods – pasta.

Spinach Tortelloni in a Chopped Tomato Sauce topped with Sliced Soft Mozzarella to be more precise.

Ingredients

  • Spinach Tortelloni (as much as you want to eat; I used half a 250g bag, so 125g)
  • 1 x 125g mozzarella ball (don’t worry if you don’t use it up; just cut as many slices you want to top the pasta with)
  • 1 x box of chopped tomatoes with juice (390g; I used the whole box but use as much as you want)
  • Mixed dried herbs (optional)

Recipe (7-10 minutes)

  1. In a pot of hot water, boil the pasta for 3-4 minutes.
  2. Drain the pasta using a sieve; set aside for the moment.
  3. Using the same pot (and hence less washing to do!), pour in the chopped tomatoes and juice; heat for 1 minute.
  4. Mix the pasta with the chopped tomato sauce for 2 minutes.
  5. Pour the pasta and sauce into a bowl.
  6. Slice the mozzarella ball into as many slices as you want.
  7. Place the mozzarella slices on top of the pasta.
  8. Garnish with mixed dried herbs.
  9. Eat.


Thursday, 10 July 2014

M&M and chocolate chip cookies

Edible color palettes #mylittlepieceofheaven
They always say that the color black can NEVER go out of fashion. Well for me, it’s generally out. Sure it can go with a lot of different sorts of items, but I daresay I much prefer the whole spectrum of colors that our world is made out of. I guess the perfect compromise would be to start off with a blank canvas or the color black and add splashes of blues, greens, reds, yellows etc. to it. It’s kinda similar to what I did with these cookies. I started off with a plain but good ol’fashioned chocolate chip cookie recipe (ELIZABETH, 2014) and then altered it to suit my style (i.e. adding pops of color, or in this case, M&Ms); I also had to adjust the size of the cookies (a rough estimate of them would be around the size of my face!) ß as you can see, I do like my cookies.

Be imaginative – try and “taste” the best of both worlds.

ELIZABETH (2014) “Best Big Fat Chewy Chocolate Chip Cookie” Recipe. [Online] Available at: <http://allrecipes.com/Recipe/Best-Big-Fat-Chewy-Chocolate-Chip-Cookie/Detail.aspx> [Accessed 10 July 2014]

Wednesday, 2 July 2014

Blueberry muffins

Good morning Wednesday

The "proper" way to start the day
I guess you can say (or tell) that I'm MAD about baking. Be it cakes, pies, cookies or even the odd meringue every so often, any oven-related cooking task is enough to keep me merry for the whole day (even if the day itself turns out to be quite a disaster).

I'm not sure why I haven't talked about this recipe before - oh well it's here now. Blueberry muffins are probably my to-go-for comfort food or breakfast choice for a sunny and early weekday morning. I probably should create my own recipe but I, personally, don't feel I'm at that level just yet (but I will be able to do so soon - I promise!). Anyhow, here's one of my all-time favorite blueberry muffin recipes. And if you do make them, I suggest baking them in colorful cupcake holders like the ones in my picture - life should be colorful, not plain.

Start your day off well - give the below recipe a shot :) xxx

Recipe from: KRUSTY (2013) "The Best Blueberry Muffins" Recipes [online] Available at: <http://www.food.com/recipe/the-best-blueberry-muffins-50719> [Accessed 2 July 2014]

Thursday, 26 June 2014

Quirk of the Day


Goat cheese mousse - meeting the colorful, summer salad

I'm all for cheese, be it Parmesan, mozzarella, cheddar, leicester and even blue (not everyone's cup of tea, I know, but hey, I find it yummy). Goat's cheese is another all time favorite but goat's cheese mousse (the white poofs of cream in the picture)? (Khoo, 2012: 21). Now that's not something you hear of everyday (in my life anyway). Despite this, my daredevil instincts pushed me to give it a go. Obviously I couldn't eat it by itself (unlike chocolate mousse), so I paired it with a nice summer salad made up of roasted capsicum, baby spinach and sausage slices. I absolutely loved the colors...and then it was time for the taste test.

The final verdict? Absolutely scrumptious.

Recipe from: Khoo, R. (2012) The Little Paris Kitchen. London: Michael Joseph


Friday, 20 September 2013

Red Grape and Rosemary Focaccia

A Brand New Day =

Waking up and turning my alarm off to go back to sleep - snoozing for another 1-2 hours is essential and healthy :)

Nah...just kidding! A new day means a new recipe to try of course! This time, I found myself getting very/ over excited about the recipe I'd found in a leaflet from Tesco's the other day in Durham. Emma Laver's (Bakery Manager at Tesco Milton, Cambridgeshire) vegetarian background and experience as a pastry chef led her to propose the following: Red Grape and Rosemary Focaccia

On today's menu...
(if you've never taken a leaflet before or have even heard of it until now,I suggest that you go into a large supermarket like Tesco's, Sainsbury's, Morrisons etc. and keep your eyes out for it or to ask one of the staff members to get you one - they really are very nommy recipes!)

I'm definitely all for bread of any sort really. But grapes and rosemary? Now that I had to pause and think for a bit - normally focaccia for me is made up of black olives or red onions, so putting a fruit in with one of my favorite herbs was a bit of a new combo. After looking it up on the net and finding that Laver's recipe was actually quite popular, I decided that I'd save the red grapes I'd purchased earlier and use it to make the focaccia. Let's hope it turns out alright, I thought.

The early stages of the dry mixture

Rules of the Baker

There was nothing overly complicated about this recipe for me - I'd made bread before so it was simply a matter of applying what I do know to a new situation (skills - checked!). For this recipe, Laver asks for the folowing:

Serves: 4, Duration = 2.5 hours (2 hours for proving the dough -- trust me, it's worth the wait!)

Mixing the dough...

Ingredients

  • 1 tsp dried active yeast
  • 1 tbsp caster sugar
  • 350ml (12 fl oz) warm water (not lukewarm, WARM water - I used 230ml cool water + 120ml hot water)
  • 450g (14.5 oz) plain flour PLUS extra to garnish
  • 1 tsp rosemary, chopped, PLUS extra sprigs to garnish (if you can't find any sprigs, like what happened to me, get a bottle of rosemary that's available in any supermarket and use that instead - works just as well!)
  • 1 tsp fennel seeds, crushed, plus extra to garnish (I didn't have JUST fennel seeds; I had a bag of mixed seeds - e.g. pumpkin, sunflower, fennel etc. - I used that instead and d'you know, I reckon it was BETTER than just chucking fennel in it :-) be bold and take risks, people!
  • 2 tbsp olive oil
  • 250g (8oz) red grades
  • Plain flour, for dusting
  • Sea salt (I used a box of sea salt flakes - really gave it the added flavour that this recipe just needed to make it a perfect focaccia)
Covering it before proving...

Equipment

  • 2-3 medium-sized bowls (I reused one of them so I only used 2 bowls)
  • Measuring beaker
  • Large baking tray (if you have an oven, it should come with it)
  • Baking parchment (size is dependent on the size of your baking tray)
  • Measuring spoons (you'll need 1 tsp and 1 tbsp - or, in my case, 1/2 tbsp because my 1 tbsp melted the other day; don't ask why)
  • Wooden spoon
  • Bread knife
  • A granite or marble work board* (this isn't 100% necessary if your worktop or island is made out of either of the mentioned materials but they're really handy when you're dealing with flour as you can simply tip all the leftover flour away and into the bin without having to dust and wipe down the entire table - I highly recommend everyone getting one of these - they can be bought in pretty much any supermarket e.g. Asda Home Living; note that they can be quite heavy).
  • Rolling pin (FROM YESTERDAY's EXPERIENCE -- make sure you use a rolling pin that is JUST A BIT smaller than your oven tray or else you won't be able to roll out the focaccia to it's full extent -- that happened to me :-(

Proving in the oven that's OFF for 2 whole hours (I'm not kidding)
Now, NORMALLY, I would say "okay kids, let's start off with preheating the oven". But, like with pretty much all kinds of bread, preheating the oven is unnecessary because your dough won't be able to go in until literally 1-2 hours later (you don't want to burn the house down by turning the oven on too early!). 

Method 

(note: a scientific word for a fool-proof recipe, literally :-)

After proving (it's grown!!!)
  • 1) Combine together the yeast and sugar in a bowl and pour in 350ml water; stir and set aside.
  • 2) In a larger bowl, combine the 450g flour, 1tsp fennel or mixed seeds (I actually added a nice hand full - that's fine too), 1 tsp rosemary and 1 tsp salt - give it a good mix.
  • 3) Pour in the yeast mixture -- FROM EXPERIENCE: it's easier to handle if you add in the yeast mixture a little bit at a time (it prevents any lumps from forming thus making it easier to mix) -- and mix using the wooden sppon.
  • 4) Sprinkle some flour over the worktop or marble/ granite work board
  • 5) Take the dough out of the bowl and knead it on the worktop for 10 minutes until smooth (there are bread machine recipes for focaccia too but not in this recipe - I don't have a bread machine so I have the KNEAD my way to success/ get food; it's fun but does require time and practice to get it right -- I'm still not perfect but watching The Great British Bake-Off and Paul Hollywood on the telly have definitely helped :-)
  • 6) Pour 1 tbsp of olive oil into a bowl (I reused the one I had the yeast mixture in earlier).
  • 7) Roll the dough in the oil to cover the entire entity.
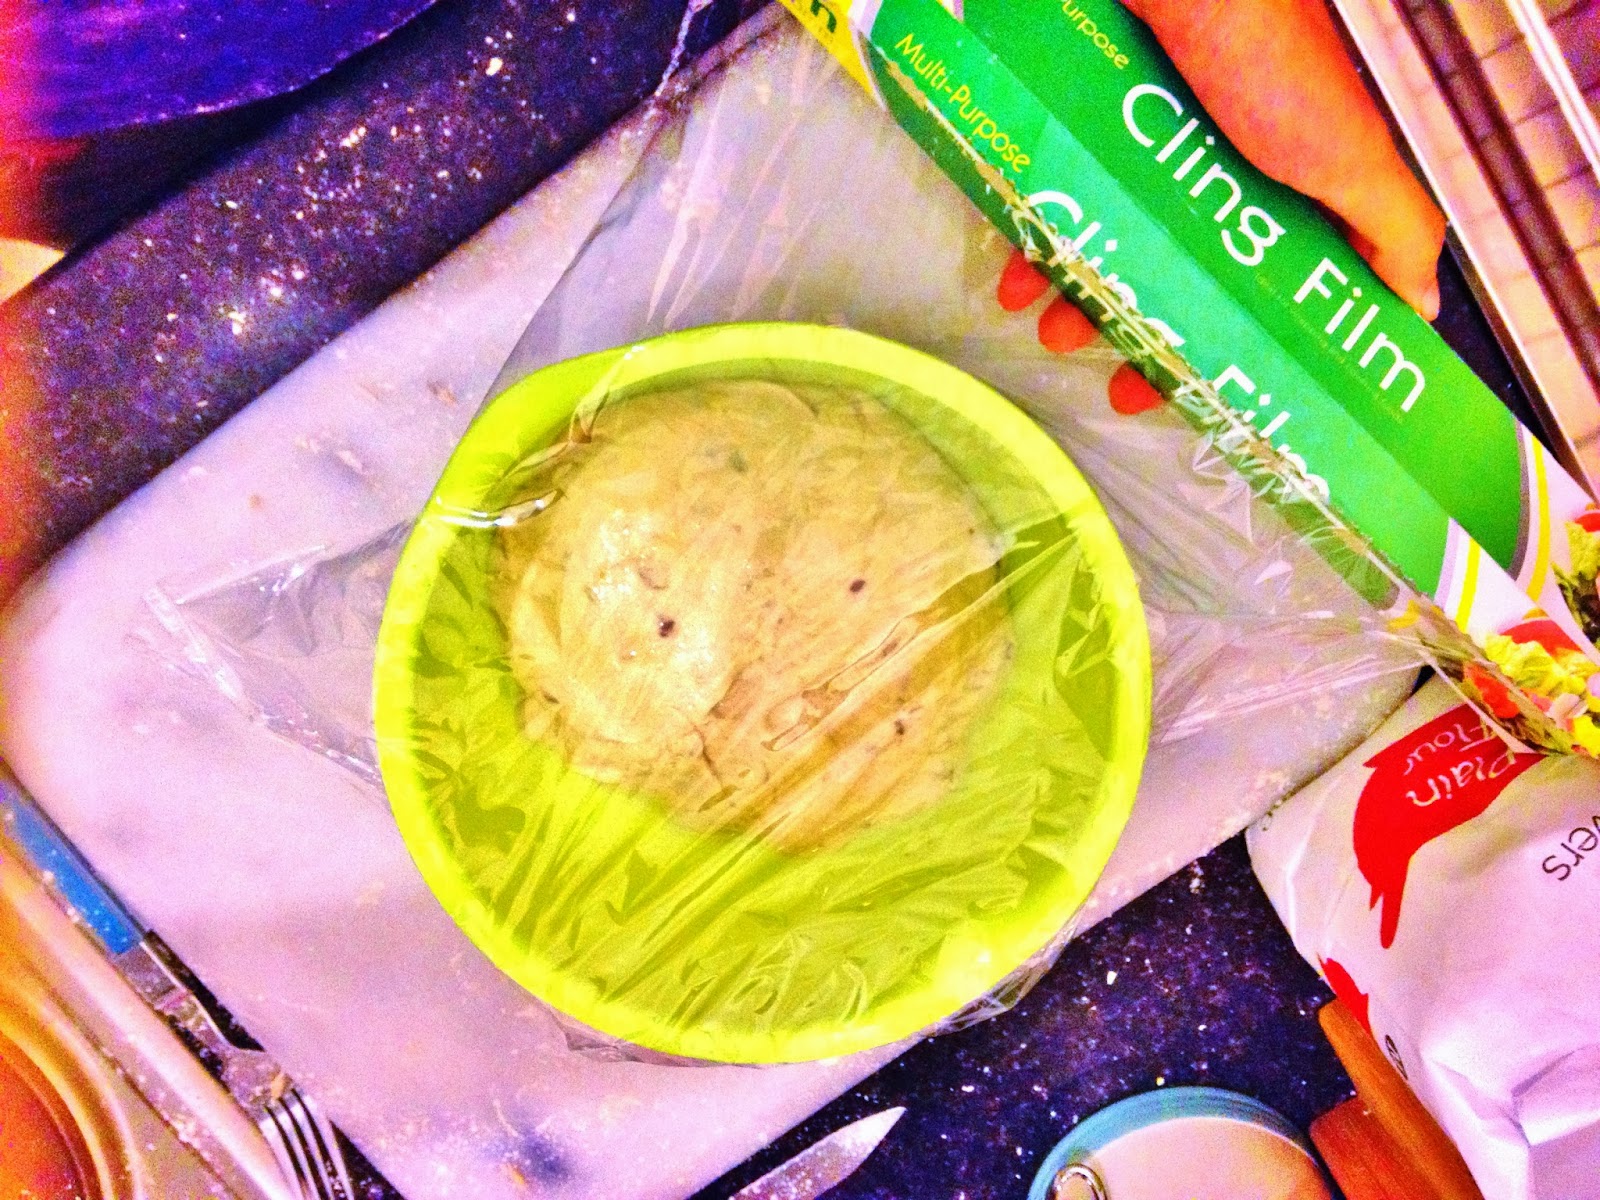
  • 8) Cover it with clingfilm and leave in a warm place for 1-2 hours until the dough has double in size (for me, it was 2 hours in my oven that was TURNED OFF)
Before rolling the dough...
  • 9) After 2 hours, take the dough out and remove the clingfilm before roughly kneading half the amount of grapes through the dough (very smart thing to do as it gives the dough a splash of color inside than just on the outside).
  • 10) Scatter a baking tray with some flour
  • 11) Using the rolling pin or your hands, stretch out the dough so that it is roughly the size of the tray (that was a bit difficult for me -- will need to improve on that in the future!)
  • 12) ***Gently slide the dough off the tray and onto the worktop (this step WAS NOT part of the recipe but made sense to me because Laver later tells you to preheat the oven WITH the baking tray and baking parchment - that wouldn't have worked for me unless I took the focaccia off from the tray it was on because I only had that one tray; if you have two or more trays, do NOT follow this step - skip to step 13)
  • 13) Cover the tray with a tea towel and it rise for 30 minutes
  • 14) Preheat the oven to its highest temperature and put a lined baking sheet on a baking tray in to heat up.
  • 15) Press the remaining grapes and some rosemary sprigs into the dough
  • 16) Drizzle the remaining oil and scatter with sea salt and fennel seeds onto the dough.
  • 17) Slide the dough onto the preheated tray and bake for 5-8 minutes (yes, it's a very fast bake but takes a lot of time to prove).
My freshly baked (odd-shaped because my rolling pin was too big - pooh) focaccia
When it's finished baking, take the tray out of the oven. It should come out with an even rise and golden-brown on the top; hopefully yours will have a better shape than mine (must buy a rolling pin that's SMALLER than my tray for the future!). Cut, using the bread knife, the required amount of slices. Serve whilst hot (yes you can eat it when it's cooled down but seriously, what's better than freshly baked and hot bread?!?!?!)

Who want's a slice? :-)
You can have it with cheese (goats' cheese is highly recommended), red pickle spread, Nutella etc. or peanut butter like I had this morning (I made the bread last night and so, I didn't have to worry about breakfast :-)  if you make it the night before, I suggest that you cut out the required amount of slices and then chuck it into the oven to heat up (it'll come out nice and crunchy on the outside but soft and springy on the inside; plus it's hot! Emphasis on the deliciousness of hot bread intended!)

If you want to know if you've made the bread correctly, follow these simple tips:
  • 1) Cut out a slice and see if there are air pockets inside the bread (I think the more there are the better -- correct me if I'm wrong).
  • 2) Using a finger, press firmly on top of and inside the bread and see if it bounces back each time; if it doesn't leave a mark, you've done it right - congratulations :-D
Note the air pockets - a professional made one has better looking and I think bigger air pockets (but I'm an amateur so leave me alone :-P
A truly delicious and easy bake - perfect for anytime of the day and undoubtedly a great way to get ANYONE up and going in the morning.

Breakfast is served :-)

Monday, 16 September 2013

Chocolate and Courgette (Zucchini) muffins

Note:

Dedicated to -- my gran; for always being there for me regardless of the trouble, and putting up to my wackiness and sporadic but frequent tempers for all these years without any complaints.

Daring to try

Sometimes I don't mind going out of my comfort zone when cooking - it's a good way to challenge myself and to get, hopefully, some good and new results. If not, it's still a good chance to learn anyway/ I mentioned I was using the book called, Annie Bell's Baking Bible, in my earlier post "Cranberry and White Chocolate Cupcakes". I had to flip through a couple of pages before I reached the recipe I needed for those cupcakes and there was one particular recipe that caught my eye: Courgette and Cinnamon Muffins. I'd made carrot cake before but courgette cakes? That was TOTALLY out of my league (at that point anyway). I kept the recipe in mind though and after a few days, I found myself looking up more courgette-related muffin recipes on the net. I finally settled with the Chocolate-Zucchini Cupcakes recipe written by Jen, an allrecipes.com contributor.

Courgette grating - dangerous work

The usual routine

There's no trick or surprise in every new recipe I try - they all start with a common beginning: locating all the ingredients. Seeing as I had a spare courgette sticking out of the fruit basket in my house, I was quite keen on making the muffins. The other things I needed were easy to find to as they were all buried deep in my dump-of-a kitchen cupboard - with all that settled, it was definitely time to start.

The colorful trio
The recipe asks for the following (note that I changed the serving amount to fifteen rather than two dozen because twenty-four muffins are too much for me; although it is tempting... ;) - click on the recipe's name to be redirected to the website where you can get the original recipe): 

The List

  • 35g unsweetened chocolate, melted
  • 2 eggs
  • 240g packed brown sugar
  • 150ml vegetable oil (I didn't have any so I used olive oil - seemed to work fine for me anyway)
  • 155g all-purpose flour
  • 3g baking powder
  • 3g baking soda
  • 2g salt
  • 140g grated courgette/ zucchini
  • 55g chopped walnuts
It also asks for 285g chocolate icing/ frosting and 30g walnut halves to decorate the cupcakes but I didn't want it to be too sweet so I didn't add any - plus I had something far better in mind.

Ingredients + utensils = mixing time
Also with the unsweetened chocolate, I used a bar of chocolate called "baking chocolate" from Lidl - the pieces of chocolate are all 10g each (as printed on each piece) and so it makes measuring the amount of chocolate much easier! Definitely worth a buy!

DIY (method)

As usual, you start off with preheating the oven to, in this case, 175°C (350°F).  

Taking a large bowl, you need to beat the eggs and brown sugar until it's thickened and pale. Because of the required condition, I assumed that I'd need an electrical egg beater (which I had, thankfully). It took me less than 10 minutes to achieve the "supposedly" required texture (emphasis on the "supposedly" -- underlying meaning to be revealed at the end).

Sweet and nutty
I then mixed in the oil and chocolate into the egg and brown sugar mixture (hereafter wet mixture). Taking another bowl, I combined the flour, baking powder, baking soda and salt together (dry mixture). Finally, using a wooden spoon, I slowly combined the wet and dry mixtures together by pouring the dry into the wet mixture. I find that it's best to start mixing just in the middle and then gradually expanding your area of mixing to the sides - your dry mixture will be thoroughly combined with the wet mixture and avoids any lumps from forming (which would otherwise spoil the texture of the cake!). Don't mix it too much - just until it moistens or is blended.

DIY muffin liners :-)

Tip in the grated courgette and give it a good mix before tipping in the chopped walnuts; I found chopping the walnuts a bit difficult so I kinda of crushed them gently just so that they managed to split in half easily using my potato masher.

Finishing touches
Taking my deformed plastic beaker, I poured the mixture into it and used it to pour the mixture into the muffin liners in the muffin tin I'd prepared earlier; I also used a rubber spatula to scrape and scoop out any remaining traces of the mixture (you really don't want to waste anything - it's something my gran always reinforced to me and it's becoming part of my daily ethos). I had proper cupcake liners but I wanted my muffins to be a bit taller so I used some normal baking paper, a pair of scissors and a bottle that was about the same size as my muffin tin to make my own muffin liners; I followed Emma Christensen's tutorial on the website, The Kitchin. The recipe suggested that I fill the muffin liners 2/3 full but there were quite a few times where I was slightly over-ambitious (at least I thought so at that time).

Baking - totally worth the wait
Before putting the muffins into the oven, I topped them with some mini marshmallows I'd gotten from the shops earlier - delightful. The muffins were in for 20 minutes and they came out a nice, shiny brown color. The look of them made me worry that they weren't full baked but, after inserting a toothpick into each muffin, I found that they were all ready to rock and roll (not literally of course). 

Evaluation

I definitely have to say that one of the biggest problems I had and it was purely my own fault were the amount of little air bubbles that had appeared on the muffin's surface - I went a bit wild with the whisk (because it'd been ages since I'd used one) so I'd over-beaten the sugar and eggs so that the mixture actually became a bit too light and airy. There was too much air in the muffins and was hence why the surface of my muffins didn't look that appealing; the marshmallows had melted too which wasn't too much of a problem but I kinda wished they hadn't. Next time I'll remember to beat the egg mixture for a shorter amount of time, if using the whisk, or to simply use a hand whisk so that I can control the strength of the beating. As for the marshmallows, I guess I could simply put them on-top of the muffins after icing them with a bit of frosting (aka edible glue).

Freshly baked
HOWEVER, in terms of flavor, they were absolutely perfect. They were sweet and chocolatey, but not too sweet because of the courgette. The courgette gave it a really moist and soft interior, and the chopped walnuts added a bit of surprising but satisfying crunch to the muffin. And, even though I had over-beaten the mixture, it made the muffins very light and not dense (definitely good for people who are dieting but want to treat themselves once in a while!). 

A combination of ups and downs (purely because of my over-ambitious personality/ because it was 11pm and adrenaline was kicking in to keep me awake and crazy) but definitely a great recipe - I wait patiently till my muffins have been eaten (by friends of course :-) in anticipation of the day when I make them again.

Packed and ready for my friends :-D


Thursday, 12 September 2013

Banana bruffins

From the kitchen window...

Thursdays are my day off from work and the indication of a long long, LONG weekend for me. And breakfast being the starting point of my day, after getting dressed of course, was no question. This morning however had me waking up and craving for something homemade. On work and uni days, an efficient and time-saving breakfast is absolutely necessary so I often opt for cereal, yogurt and fruit. With the sun beaming down on me and free-time in hand, my brain switched from being "fast asleep" to "feeling creative and hungry" as I gazed out my kitchen window. 

Daydreaming...
Something I haven't had for long time, that's what I want to make. I love trying new recipes but there are times when one desperately wants something comforting and convenient to make - things I've tested before and are familiar really. My eyes landed on two overripe bananas hanging on the arm of my fruit bowl. Banana bread, I thought, now that's what I want.

Google search + allrecipes.com

That's how I usually roll when it comes to cooking - like I said before, cookery books are often for gazing at and admiring the quality of the pictures rather than to be used as my blueprints for cooking in my house. I knew exactly which recipe I wanted - I'd tried it many times and it's never failed me. Banana Banana Bread - a recipe created by Shelley Albeluhn (2000), a contributor to allrecipes.com's dazzling archive of fun and fresh recipes. Her recipe yields approximately 12 servings or one big loaf which, is indeed a nice and appropriate amount, was a bit too much for my one stomach - I didn't want to end up eating banana bread for one whole week! Also I didn't have enough bananas for that amount anyway - time to give the recipe a little twist and alteration.

Let the fun begin!
To make the banana bread, Albeluhn (2000) asks for the following - note that the amount has been halved because that's all I wanted, so do double it if you want the original amount:

The List

  • 1 cup / 125g all purpose flour
  • 1/2 tsp / 2g bicarbonate of soda
  • 1/8 tsp / 0.8g salt
  • 1/4 cup / 55g butter
  • 1/4 cup and 2 tbsp / 55g brown sugar
  • 1 egg, beaten
  • 1 cup and 3 tbsp / 260g mashed overripe bananas
Simple isn't it? Just some common kitchen essentials and, the secret, overripe bananas. In terms of equipment, I had three bowls, a set of measuring spoons, one measuring cup, scales, a potato masher, a muffin tin and liners, wooden spoon and, my favorite and critical weapon tool, a rubber spatula. I had both the scales and measuring cup only because the side of my measuring cup kind of melted (don't ask me, I don't know what happened but it's slowly dying - will have to replace it soon :(  so I can't see all the numbers properly. So I had to rely on the scales for some of the measurements e.g. the amount of flour.

At work...
To start off, preheat the oven to 175°C mix together in a bowl with the wooden spoon the flour, bicarb. of soda and salt. Since I had a muffin tin and liners, I didn't grease a loaf pan (I think it would be  7" or 9") like the recipe asked; do this if you want to instead of my way. In another bowl, cream together the brown sugar and butter - you're supposed to use an electric beater but I didn't have one so I used my wooden spoon instead; do use the beater if you have one! Mash the bananas in the remaining bowl using the potato masher and alternatively with a fork if you don't have one.
 Pour the mashed bananas into the creamed brown sugar and butter as well as the beaten egg and mix with the wooden spoon. Thereafter pour the banana mixture into the flour mixture and stir only to moisten - otherwise your banana bread will be dry and that would be very sad (Albeluhn, 2000). 

Finishing touches -- dried oats and desiccated coconut flakes

You can then pour the mixture into the muffin liners in the muffin tin or the prepared loaf pan using the wooden spoon. I didn't want to make a mess so I poured my mixture into the measuring cup and used that to pour the mixture into the muffin liners; I scraped every last bit of it into the liners using my rubber spatula to avoid wasting. The reason why I used muffin liners was that I didn't have a small enough loaf pan to accommodate for the amount of mixture I'd made - you don't want a huge pan for a small amount of mixture as your banana bread will come out very flat (that's happened to me before!).\ I was technically making banana muffins but as the recipe is for banana bread, I have renamed my muffins banana bruffins in honor of the two kinds. To give it an additional twist and a bit of crunch, I added some dried oats and desiccated coconut flakes on top of each muffin - I even did two 50/50 ones where half was covered in dried oats and the other half in coconut flakes.

Before...
I popped mine in the oven for around 35 minutes seeing as 1) I only made half of the original amount and 2) I made mine into muffins so there was a bigger surface area to volume and hence would require a smaller amount of time to bake (thank you year 9 science). When my flat began to smell strongly of freshly baked banana bruffins and the alarm on my oven began to ring, I knew they were done :)

After...
So, after a long but fun and relaxing one hour, my breakfast was finally complete. The bruffins should be moist and slightly bouncy (not the best way to describe the texture but hey you get the point), and the top should be crunchy and golden (yum!). Good to eat and to share with people you love/ know/ feel like treating/ want to use as guinea pigs for future kitchen experiments (muahahaha).

Freshly baked - what could be better, seriously?

A day off work for everyone, in my opinion, calls for an indulgent way to start the day. It doesn't mean that it averts me from doing the cleaning and washing up though (meh... -___-) but, at least it gets you going on the right foot right? :)

A beautiful mess :)

Bibliography

Albeluhn, S (2000) Banana Banana Bread [online]. Available at: <http://allrecipes.com> [Accessed 12 September 2013].

Friday, 6 September 2013

Bloglovin

<a href="http://www.bloglovin.com/blog/10570395/?claim=cczsbz7wnr2">Follow my blog with Bloglovin</a>

Just a quick message from the host...

Hi everyone! I've just signed up onto bloglovin! You can follow me and find my blog through their site now - looking forward to meeting new and experienced, passionate bloggers :)

xx 

The Amateur Anthropologist :)

Cranberry and White Chocolate Cupcakes

Attention: Kitchen Experimentation Alert

Well, no not really, but I am posting about some Cranberry and White Chocolate cupcakes I made yesterday :) I bought a packet of dried cranberries a while ago and have been dying to use them with white chocolate. Fortunately, I passed by ASDA the other day and managed to pick up a small packet for way less than £1. I'm all set now, I thought at about 8pm last night, time to make my cupcakes!

Normally, I'd go to allrecipes.com and find a recipe to follow that'shad about 500+ five star ratings (my assumption is that the more ratings there are, the more approved and workable the recipe is! I have yet to be proven otherwise :P). However, I chose to use a recipe book, called Annie Bell's Baking Bible. I have around 10+ recipe books in my house, where more than 60% are from charity shops (for less than £2!!!), and I have a habit of not using them a heck lot; I tend to flip through the book and simply pay attention to the nice pictures or illustrations only (but hey! Don't we all?). Anyway, even though I used the vanilla cupcake recipe from the book, I still altered it; the book suggested using icing sugar, I chose to use cranberry and white chocolate chips. There's no point in following a recipe completely unless you're learning how to make the item for the first time. As long as you have a good understanding of how to create the product in general, you can alter and change the recipe however you want to create some absolutely AMAZING results.

Butter's still in the fridge xD nevertheless, let the fun begin!
The recipe actually yields 12-14 cupcakes, but I made half the amount - if I made that many, I'd be having cake for breakfast, dinner and tea! (Not like I'm not tempted to, but I'm quite good at resisting temptation even in situations like this xD. It asks for the following (note that the original asks for double):

The list (Bell, 2012: 108)

  • 1 Egg 
  • 55g flour 
  • 55g caster sugar 
  • 55g unsalted butter, diced 
  • 1/2 tsp baking powder 
  • 1/4 vanilla extract 
  • 6-7 cupcake containers 
  • 1 cupcake tray (enough for a dozen) 
  • 1 cupcake container full/ dried cranberry pieces 
  • 1/2 cupcake container full/ white chocolate chips 
The measurements for the dried cranberry pieces and white chocolate chips are mine. I realize now that I may not necessarily have measured them in a standard cupcake container (although I think it should be right). I got the cupcake containers from B&M bargains if that helps; other than that, I reckon a good eye and self-judgement is the best way to go with both ingredients :)


The ensemble of ingredients
Bell's book states to preheat the oven to 180°C (fan) and then to place the cupcake containers into the tray. She then says to place all ingredients into a food processor to mix (Bell, 2012: 108). Now, I don't have a food processor but I found using a whisk and some elbow grease work more than fine. You wanna get it so that it is light and fluffy; any lumps should be beaten until they disappear. I doubt that that'll be an issue in general anyway due to the small amount of flour. If you do use a whisk like I did, remember to whisk it until the diced butter pieces have thoroughly combined with the mixture - if you don't, you risk an uneven bake with some cupcakes being more oily than others.
Nice and fluffy - the power of whisking and some basic kitchen skills a bit of girl power ;P
Finishing touches - dried cranberry pieces and white chocolate chips!
Once you've mixed everything together and are satisfy with the quality of your mix, pour the mixture into the cupcake containers, ensuring that there is an even amount in each. I started off with thinking that I needed 7 containers but I only ended up using 6. Don't be afraid to change the recipe as you go - had I tried to make 7 by putting a smaller amount of mixture in each container, I probably wouldn't have had such a nice rise and size. Also, I find using a rubber spatula helps to ensure that you get pretty much all your mixture into the cupcake containers - it's important not to waste in my opinion, especially since you've worked so hard on making the mixture in the first place! Put it in the oven to cook for 17-20 minutes. As I had been cooking my dinner beforehand, my oven was set at a higher temperature than Bell asked for, so I only had to bake my cupcakes for 12-13 minutes (and yes they were fine! The old tooth-pick in cupcake trick told me so :)

Mixture into the containers and ready to go...
Time for tea :-)
...into the oven :)
By the time I finished my dinner, the house smelt of freshly baked cupcakes. Obviously I needed to have a taste of it but I thought I'd take a couple of pictures before I did. They tasted FANTASTIC. Really light and fluffy. I thought It would be overly sweet because I hadn't put any salt in the mix at all but it didn't need it - it was just right for me. I guess if I'd followed the original recipe it may have been to sweet for me had I made the icing to go on top of it as well. My only criticism to the recipe was the amount of butter - a bit too much for me. It was quite oily when I took it out and I've tried other recipes that can give you the exact same cupcakey texture using a much smaller content of butter. Nevertheless, definitely a good use of time at night and a great way to end the day :)

Et viola! 

Bibliography (because I am so dang nerdy B-D

Bell, A (2012) Annie Bell's Baking Bible: Over 200 triple-tested recipes that you'll want to cook again and again. Kyle Books: London

Afternoon tea Nighttime snack attack :P

Sunday, 1 September 2013

Welcome to my life...

Why hello there...

Welcome to my blog. I'm not a huge fan of long paragraphs so I'll keep (or try to at least) my intro sweet, short and straight to the point. I finished my first year of uni (yay!) in Anthropology (hence the name of the blog) in mid May and was left with more than a month's wait to try to find something to do in the north east before I headed down to London. 

I'd been told by loads of people that there really wasn't much to do around here so I expected a barren and boring wait. However, after looking around through brochures, websites and listening out for the places my friends appeared to have gone that were within the north east range, I managed to gather a list of landmarks and sites that I ought to visit. And even up until today, I haven't managed to visit even a third of the places I'd noted down. The castles, halls and gardens I visited were all magical. 

Every place added a chapter to my internal knowledge bank of England's history and development, every moment was memorable, and every day was a new adventure. And, to be honest, had I'd left the north east immediately like a few of my friends had with the assumption that there was nothing to do, I definitely wouldn't have had such an amazing holiday

So, essentially, this blog is a photo journal of all my adventures I've had in different areas of the north east. It includes, castles, gardens, beaches, parks etc. and also my thoughts during that time and any funny anecdotes. At the end of the day, I hope that my blog will convince you to come up north to see what there is to offer in this stunning and breathtaking environment. At the same time, I hope it'll also inspire you to look at things in a different angle. Often you'll find that my pictures are of quite mundane and ordinary things like huge forests and old buildings, or even just some graffiti on the wall.  But it is that level of simplicity that I crave for and should be craved for by everyone. For when we learn to appreciate the simple things, life becomes more beautiful and enjoyable. You forget about all the things that causes stress like materialism, relationships, the economy etc. It's a rejuvenating and relaxing experience, one of which will free ours minds and help our imagination soar to an even greater level (at least that was the case for me).

So grab your good walking shoes, water bottle, sunscreen and camera, and come with me, the amateur anthropologist, as I take you on my great summer adventure of north east England... :-)


The Amateur Anthropologist :-P